Made this one in a pinch the other night, and it was a DELIGHT. (No pictures, lo siento.)
1) chop an onion, 3-4 cloves of garlic, and about a table spoon of ginger. Place all three in a food processor and mince (if no food processor available, just chop into little bits).
2) Start a pot for your basmati rice and add once water is boiling. (the rice will take about 20 minutes depending on how soft you want it - be sure to check the pot and stir rice occasionally so it doesnt dry out and stick to the pot. Add water if necessary)
3) Add a tsp of olive oil to a sauce pan, heat, and then toss in your minced onion/garlic/ginger. Sizzle until aromatic (a few minutes).
Now the fun part. In the same pan add (according to taste):
1.5 tsp turmeric
1.5 tsp curry powder
1 tsp cumin powder (or freshly ground cumin seed if you're a stud)
1 tsp coriander powder (" ")
1 tsp of garam masala
a few cardamom pods
2 bay leaves
A pinch of rock salt and ground pepper.
Stir into onion/garlic/ginger mixture.
4) Immediately add your vegetables to the pan. If you have less time, grab a bag of frozen asian stir-fry veggies. If you have more time, pick out some fresh favorites (potatoes, cauliflower, broccoli, okra, eggplant, zucchini, mushrooms would all be good) and chop them prior to cooking.
Stir vegetables into seasoning and minced mixture until evenly dispersed.
5) once the veggies have become soft, add 1 can of coconut milk (be sure to shake the can to achieve proper thickness. Stir.
let ingredients stew for a short while until you think it looks delicious enough to eat.
6) spoon rice onto a plate and ladle the curry over the rice.
voila!
Tuesday, August 10, 2010
Monday, August 9, 2010
Preserves!!

 Sue and George came to visit this week and while they were here I heard that the peaches were ripe at Shelburne Orchard so we went to pick a few. We may have overdone it a little because we ended up with 12 pounds of peaches! Some got eaten right away, some got sent on to mom and dad, but I was still left with almost five pounds of peaches. Which is a whole lot when you can't eat fresh fruit. I asked a friend for help and got this recipe for peach preserves.
4 pounds of peaches: peeled, pitted, sliced
1 package powdered pectin
2 Tbsp. lemon juice
7 cups sugar
Combine all in a saucepot. Bring to a boil, stirring gently until the sugar is dissolved. Boil 1 minute. Ladle into jars (can or freeze).
Seemed easy enough so I brought all the fixings out to the farm to get help from Laura (and because it just seemed right to make preserves at a farm).
 Laura suggested par-boiling the peaches to get the skins off quickly and easily so I checked the Joy of Cooking for instructions. I love that book, it gives the most basic instructions in detail.... which I need.
In the end it was really easy. I made 5 pints of preserves and had a bit left over in the pot which we ate while still warm over ice cream.
I won't know until it all cools if it successfully gelled but it's tasty already anyhow.
You can expect to get some the next time I see you :)
I also got a recipe for peach butter that I'd like to try but have now run out of peaches. I may have to pick more.
Monday, May 3, 2010
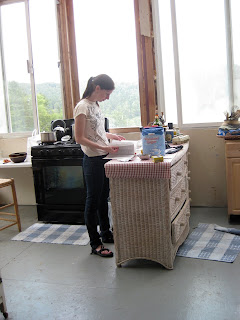
Kitchen Sink Tempeh
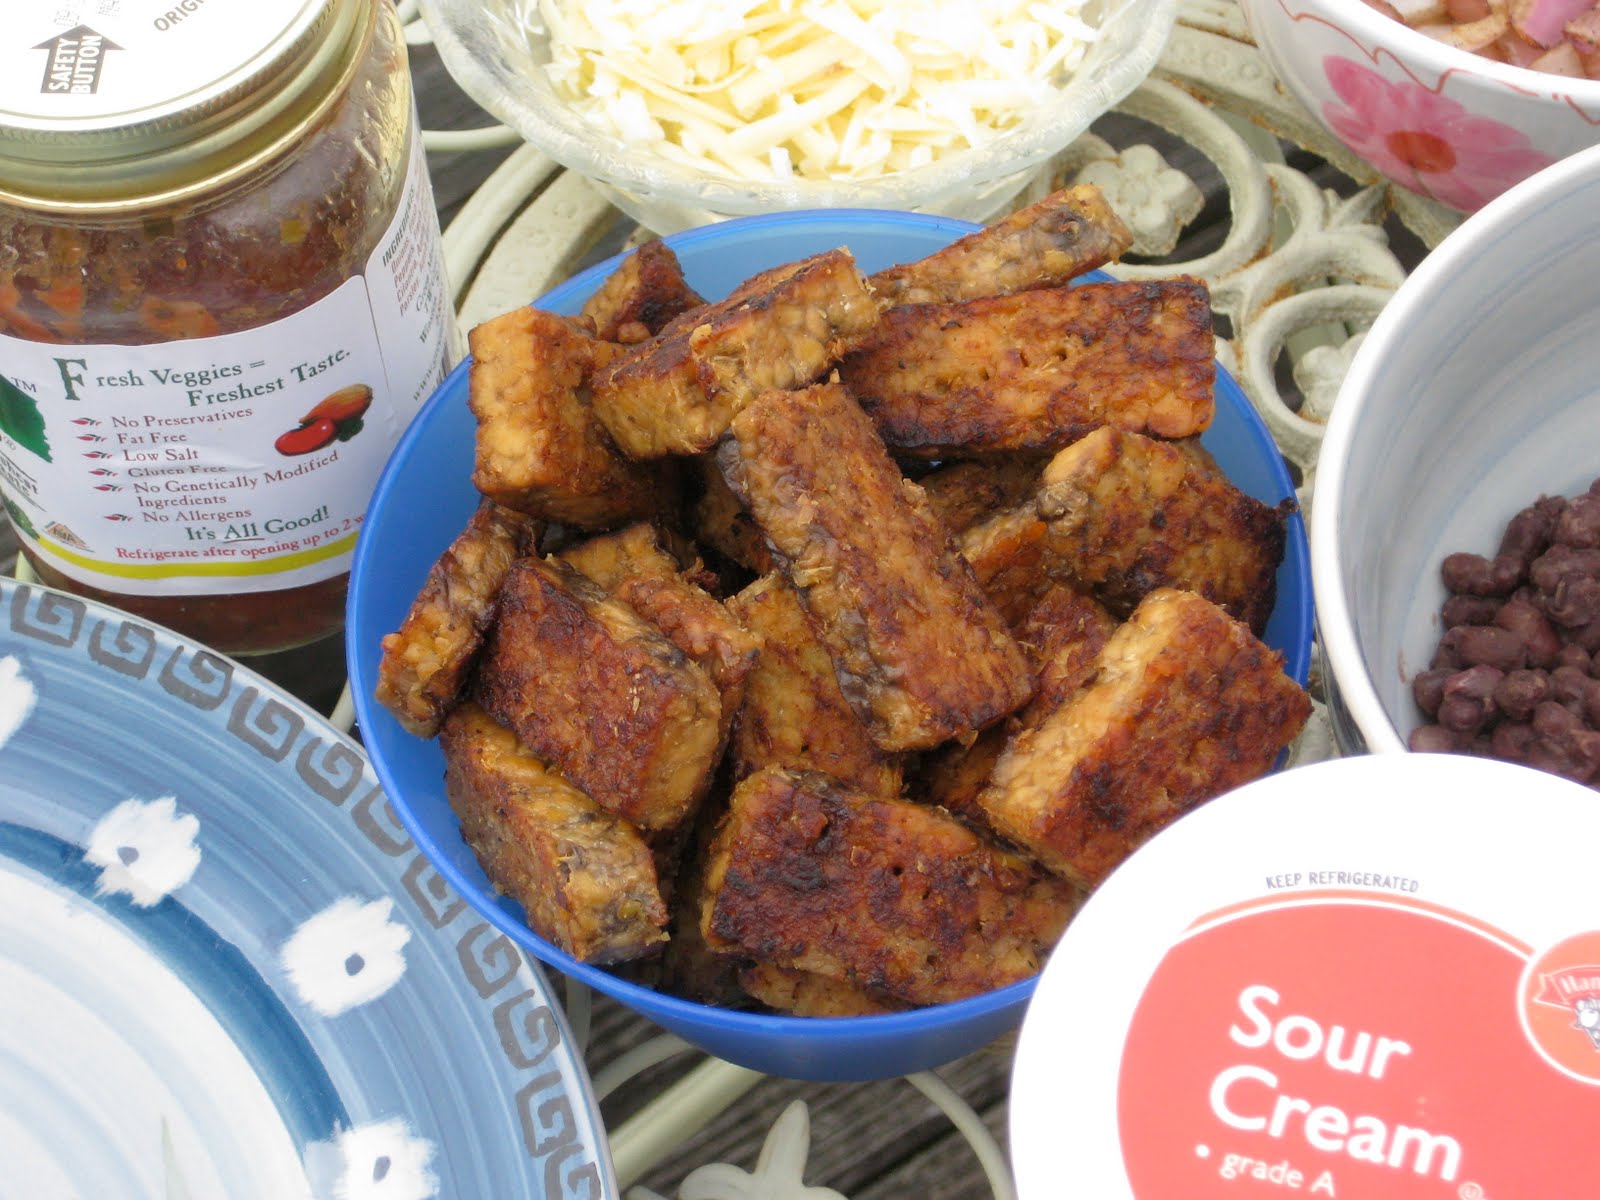 A favorite staple here at the farmhouse is what I like to call "Kitchen Sink Tempeh" because it's seasoned with everything but the kitchen sink. We like to get the Rhapsody Tempeh but we've also used the LightLife organic three grain tempeh. First cut it into strips less than a 1/4 inch thick. If you've never used tempeh before don't be put off if there's some black on the uncooked tempeh; it doesn't mean it's gone bad.
Put olive oil in a frying pan on low heat and place the strips of tempeh in the pan in a single layer. Flip them immediately and drizzle a little sesame oil over top. Then add the rest of the ingredients as the tempeh cooks. No, I don't have measurements of how much to add, just sprinkle and dash to taste. We use:

Apple Cider Vinegar
Braggs Liquid Aminos
Lime Juice
Ground Mustard
Garlic powder
Honey
Salt and Pepper

Cook the tempeh flipping occasionally until brown and crispy looking on the outside. Here's Julie with a perfectly browned piece.

How to use it? We put it with rice or quinoa and cooked veggies. Or even better as a burrito with beans, onions, sour cream, salsa, and cheese. Now that the weather is nice enough we've been doing more and more out on the second floor back deck including eating dinner and playing Rock Band!
Sunday, April 25, 2010
Baked Kale Chips
My friend Sasha brought these to Stitch and Bitch a couple of weeks ago and I pretty much stood at the counter and ate all of them. Not very good potluck behavior.


Prep Time:
Cook Time:
Ready In:
Ingredients
Nutritional Information
Baked Kale Chips

Prep Time:
10 Min
Cook Time:
10 Min
Ready In:
20
Ingredients- 1 bunch kale
- 1 tablespoon olive oil
- 1 teaspoon seasoned salt
Directions
- Preheat an oven to 350 degrees F (175 degrees C). Line a non insulated cookie sheet with parchment paper.
- With a knife or kitchen shears carefully remove the leaves from the thick stems and tear into bite size pieces. Wash and thoroughly dry kale with a salad spinner. Drizzle kale with olive oil and sprinkle with seasoning salt.
- Bake until the edges brown but are not burnt, 10 to 15 minutes.
Nutritional Information 
Amount Per Serving Calories: 58 | Total Fat: 2.8g | Cholesterol: 0mg
Sunday, March 28, 2010
Mom and Dad's Visit
Tad and I can't fit in our pants following Mom and Dad's Visit. I had to bust out my fat pants. Here was some of our food concoctions:

Creamy Horseradish and Dill Dip


Serves 6Hands-On Time: 05mTotal Time: 05m
Ingredients
- 8 ounces cream cheese, softened
- 1/4 cup prepared horseradish
- 2 tablespoons whole milk
- kosher salt
- 2 tablespoons chopped fresh dill
- dippers (such as celery sticks, cucumber rounds, and potato chips)
Directions
- In a medium bowl, beat the cream cheese, horseradish, milk, and 1/4 teaspoon salt until fluffy. Stir in the dill. Serve with the dippers.
Rosemary Pecans

Serves 8Hands-On Time: 10mTotal Time: 20m
Ingredients
- 2 tablespoons unsalted butter
- 1 teaspoon sugar
- 1/8 teaspoon cayenne pepper
- 1/2 teaspoon kosher salt
- 2 cups pecan halves
- 2 teaspoons chopped fresh rosemary
Directions
- Heat oven to 375° F. Melt the butter in a medium skillet over medium heat. Stir in the sugar, cayenne pepper, and ½ teaspoon salt. Add the pecans and toss to coat.
- Transfer the pecans to a rimmed baking sheet and arrange in a single layer. Bake, stirring occasionally, until toasted, 10 to 12 minutes.
- Add the rosemary and toss to combine. Serve warm or at room temperature.

Sunday, March 7, 2010
Rubby mcrubbersons
I've never done a dry rub on meats before so I thought I'd give this one a try on steaks. Tad says "It was real tastey."
 Easy nuf.
All-Purpose Rub
4-6 Hands-On Time: 0hr 05m Total Time: 0hr 05m
Ingredients
- 1/4 cup chili powder
- 1/2 teaspoon ground cumin
- 1/4 teaspoon dry mustard
- 1/8 teaspoon ground cinnamon
- 1/2 teaspoon dried oregano
- kosher salt
- Olive oil
Directions
- In a small bowl, combine the chili powder, cumin, mustard, cinnamon, oregano, and 2 teaspoons kosher salt.
- Add enough olive oil to make a paste and rub over raw meat, under and over chicken skin, or on seafood.
Saturday, February 27, 2010
Easiest from Scratch Bread

So I know this won’t work for Erin… and Mom probably would avoid having this much bread in the house too…. but I had to share this anyway.
While working at the Bradford Public Library the librarian Gail told me about this great cookbook she’s been using to make bread from. It’s called Healthy Bread in Five Minutes a Day. The basic recipe was published in Mother Earth News in their December 2009/January 2010 issue and although it’s pretty wordy, it was actually really, really easy…. no kneading and no punching. It’s practically idiot proof. The best part is that you make a huge batch of dough, FOUR POUNDS worth. Then you just pull off a hunk and bake each loaf as you need it. The dough lasts up to 2 weeks in the fridge and becomes more sourdough-like the longer you keep it. I’m putting the basics here but the whole article in M.E.N. has way more details and information about ingredients.
5 1/2 c. whole wheat flour
2 c. unbleached all-purpose flour
1 1/2 Tbsp (2 packets) granulated yeast
1 Tbsp kosher salt
1/4 c. vital wheat gluten (Bob’s Red Mill or Hodgson Mill recommended)
4 c. lukewarm water
1-2 Tbsp whole seed mixture (optional)
- Measure the dry ingredients and mix together in a 5-quart bowl or re-sealable lidded (not airtight) container.
- Heat the water to slightly warmer than body temp (about 100 degrees F). Add to the dry ingredients and mix without kneading, using a spoon, food processor (with dough attachment) or heavy-duty stand mixer (with paddle). Don’t knead! It isn’t necessary. You’re finished when everything is uniformly moist, without dry patches. This step is done in a matter of minutes, and yields a wet dough that remains loose enough to conform to the shape of its container.
- Cover dough with a lid (not airtight) or cover loosely with plastic wrap. Allow it to rise at room temperature until it begins to collapse (or at least flatten on top), which will take about 2 hours. Longer rising times – even overnight – will not change the result. Fully refrigerated dough is less sticky and easier to work with than dough at room temp. So, the first time you try our method, it’s best to refrigerate the dough overnight (or at least 3 hours) before shaping a loaf. Whatever you do, do not punch down this dough!
- Dust the surface of the refrigerated dough with flour. Pull up a 1-pound (grapefruit sized) piece of dough and cut using a serrated knife or kitchen shears. Hold the dough in your hands and add a little more flour so it won’t stick. Gently stretch the surface of the dough around to the bottom on all four sides. This should take no more than 20-40 seconds. If you work the dough longer than this, it may make your loaf too dense.
- Stretch the ball gently to elongate it and taper the ends.
- Allow the loaf to rest covered with plastic wrap on a pizza peel covered with cornmeal or parchment paper or a silicone mat (or just use a greased cookie sheet) for 90 minutes.
- Preheat the oven to 450 degrees for half an hour with a baking stone placed on a middle rack and an empty broiler tray on the very top or bottom rack.
- Just before baking use a pastry brush to paint the loaf with a little water and sprinkle the seed and nut mister on top. Slash the loaf with quart-inch-deep parallel cuts with a serrated bread knife.
- After the oven is preheated slide the loaf off the pizza peel onto the baking stone in the oven (or just put the cookie sheet in the oven). Pour 1 cup of water into the empty broiler tray in the oven and close the door to trap the steam. Bake for about 30 minutes or until the crust is richly browned and fir to touch. If you used a cookie sheet, remove it and bake the loaf directly on the stone or oven rack when it’s about two-thirds of the way done. Allow the bread to cook on a wire cooling rack.
- Store the rest of the dough in a container in the fridge and use over the next couple of weeks. Over time it ferments and takes on sourdough characteristics.

Tuesday, February 23, 2010
Pisgah's birthday dinner....
Today is Pisgah's birthday and this is what we had....
Salmon with Brown Butter Sauce

Y'all, this is good.
The recipe was in the March issue of Real Simple. Here it is below:
Serves 4
Hands-On Time: 20m
Total Time: 20m
Ingredients
4 tablespoons unsalted butter
1 1/4 pounds skinless salmon fillet, cut into 4 pieces
kosher salt and black pepper
1 pound green beans, trimmed and halved crosswise
1/4 cup sliced almonds
2 tablespoons capers
Directions
Heat 1 tablespoon of the butter in a large nonstick skillet over medium heat.
Season the salmon with ½ teaspoon salt and ¼ teaspoon pepper.
Cook until opaque throughout, 3 to 5 minutes per side; transfer to plates.
Meanwhile, fill a second skillet with ½ inch of water, bring to a boil, and add ¼ teaspoon salt.
Add the green beans, cover, and steam until just tender, 4 to 5 minutes; drain and transfer to plates.
Wipe out the green bean skillet and heat the remaining 3 tablespoons of butter over medium heat.
Add the almonds and cook, stirring frequently, until the almonds and butter are golden brown (but not burned), 2 to 3 minutes.
Stir in the capers. Spoon over the fish and green beans.
So while I did use this recipe I did not follow it verbatim.
Here is our version:

I did use 4 TB of butter, which I heated on a non-stick skillet. We use Earth Balance butter, which is soy or something, and it works great.

I seasoned both sides of the salmon with salt/pepper
Once the butter was hot I put the salmon on the pan. I cooked the salmon for about 4-5 min on each side. I added the capers towards the end, when the salmon was almost done.
Instead of green beans, which we didn't have, I used frozen spinach.
I boiled it in water, drained it, and then threw in 1TB of butter and some minced garlic and let it simmer.
While all of this was cooking I toasted some almonds. (I didn't want to put them in the butter, because I like them crispy)
Once the salmon and spinach were done I put them on the plate and sprinkled the almonds over.
DEEELISH.

Accompanying our meal we had bread
and wine

(notice Pisgah's reflection in the wine glass)
And while Pisgah could not eat the dinner we prepared in her honor, she did get lots of snuggles with me...

John....

and the monkey.

Along with many treats and a birthday bone.
Salmon with Brown Butter Sauce

Y'all, this is good.
The recipe was in the March issue of Real Simple. Here it is below:
Serves 4
Hands-On Time: 20m
Total Time: 20m
Ingredients
4 tablespoons unsalted butter
1 1/4 pounds skinless salmon fillet, cut into 4 pieces
kosher salt and black pepper
1 pound green beans, trimmed and halved crosswise
1/4 cup sliced almonds
2 tablespoons capers
Directions
Heat 1 tablespoon of the butter in a large nonstick skillet over medium heat.
Season the salmon with ½ teaspoon salt and ¼ teaspoon pepper.
Cook until opaque throughout, 3 to 5 minutes per side; transfer to plates.
Meanwhile, fill a second skillet with ½ inch of water, bring to a boil, and add ¼ teaspoon salt.
Add the green beans, cover, and steam until just tender, 4 to 5 minutes; drain and transfer to plates.
Wipe out the green bean skillet and heat the remaining 3 tablespoons of butter over medium heat.
Add the almonds and cook, stirring frequently, until the almonds and butter are golden brown (but not burned), 2 to 3 minutes.
Stir in the capers. Spoon over the fish and green beans.
So while I did use this recipe I did not follow it verbatim.
Here is our version:

I did use 4 TB of butter, which I heated on a non-stick skillet. We use Earth Balance butter, which is soy or something, and it works great.

I seasoned both sides of the salmon with salt/pepper
Once the butter was hot I put the salmon on the pan. I cooked the salmon for about 4-5 min on each side. I added the capers towards the end, when the salmon was almost done.
Instead of green beans, which we didn't have, I used frozen spinach.
I boiled it in water, drained it, and then threw in 1TB of butter and some minced garlic and let it simmer.
While all of this was cooking I toasted some almonds. (I didn't want to put them in the butter, because I like them crispy)
Once the salmon and spinach were done I put them on the plate and sprinkled the almonds over.
DEEELISH.

Accompanying our meal we had bread

and wine

(notice Pisgah's reflection in the wine glass)
And while Pisgah could not eat the dinner we prepared in her honor, she did get lots of snuggles with me...

John....

and the monkey.

Along with many treats and a birthday bone.
Sunday, February 21, 2010
Buttermilk-Currant Scones with Lemon Glaze


YUMMY!
Buttermilk-Currant Scones
with lemon Glaze
with lemon Glaze
PREP AND COOK TIME: About 45 minutes
MAKES: 8 scones
Ingredients
2 1/2 cups all-purpose flour
1/4 cup granulated sugar
2 teaspoons baking powder
1/2 teaspoon salt
1/2 cup cold butter, cut into chunks
3/4 cup buttermilk
1 large egg
1/2 cup dried currants
1 tablespoon grated lemon peel
2/3 cup powdered sugar
2 tablespoons lemon juice
Directions
1. Preheat oven to 350°. In a bowl or food processor, mix or whirl
flour, sugar, baking powder, and salt to blend. Add butter and cut in
with a pastry blender or pulse until mixture resembles coarse meal. If
using a processor, scrape mixture into a bowl.
2. In a small bowl, whisk buttermilk and egg to blend. Add to flour
mixture along with dried currants and lemon peel. Stir with a fork just
until evenly moistened (dough will look crumbly).
3. Scrape dough onto a floured surface and, with lightly floured hands,
work it into a ball, then pat into a 7-inch round about 13/4 inches thick.
Cut dough into eight equal wedges. Arrange wedges 2 inches apart on a
baking sheet.
4. Bake scones until tops are browned, 20 to 25 minutes. Let cool
about 10 minutes on baking sheet. Meanwhile, in a small bowl, stir
together powdered sugar and lemon juice. Drizzle glaze over warm
scones. Serve scones warm or let cool completely.
Tuesday, February 9, 2010
What single gals eat for dinner
Ok, obv. I'm not "single", but since John has late classes on Tuesday and Thursday nights, Pisgah and I have a little girl time. We paint our nails, light candles, do a little yoga and then we make dinner.

Only (gasp) I don't really like cooking. Following recipes is not my strong suite.
Anyway, on nights such as this I end up making one of my favorite things ever:
THE EGG AND CHEESE ENGLISH MUFFIN.
Thankfully English muffins don't mess with my gluten thing (although I don't know why)

Only what I make doesn't look like that....
It looks more like this:

But it tastes great.
And just for kicks I thought I would give you the recipe since you know, it can be a tricky thing to make.
Step 1: Find an English Muffin
Step 2: Cut in half and slather on butter
Step 3: Throw it in the frying pan. I don't toast because 1) we don't have a toaster 2) our oven scares me...plus throwing on the pan just adds to the sizzle factor.
Step 4: Cook until crispy.
Step 5: Remove English muffin and throw eggs on pan
Step 6: Cook eggs to personal preference.
Step 7: While eggs are cooking grab other things to add to sandwich...cheese, turkey bacon, tomato, salt, pepper...
Step 8: Toss eggs onto muffin.
Step 9: Devour.
Moroccan Meatballs in Spicy Tomato Sauce
Mom just fixed this for us and it was soooo good. I plan to sneak into the kitchen late tonight and eat some more!
Moroccan Meatballs
in Spicy Tomato Sauce
Sweet and savory seasoned meatballs simmer in an
aromatic tomato sauce for a Mediterranean-style dinner.
Use kitchen shears to coarsely chop the tomatoes
while they are still in the can. You can shape the meatballs
in advance and store them in the freezer to save
time. The rest of the recipe is best prepared and
cooked the same day.
MEATBALLS:
1/2 cup dry breadcrumbs
1/4 cup dried currants
1/4 cup finely chopped onion
1/2 teaspoon salt
1/2 teaspoon ground cumin
1/2 teaspoon dried oregano
1/4 teaspoon ground cinnamon
mix 11/2 pounds lean ground beef
1 large egg white
sth- Cooking spray
loaf SAUCE:
d of 1/4 cup tomato paste
ker. 1 teaspoon fennel seeds
leat 1 teaspoon grated orange rind
me- 1/2 teaspoon ground cumin
loaf V4 teaspoon ground cinnamon
o 6 1/4 teaspoon salt
1/4 teaspoon ground red pepper
'6.1g; 1 (28-ounce) can whole tomatoes, coarsely
chopped
REMAINING INGREDIENTS:
3 cups hot cooked couscous
Chopped fresh parsley (optional)
1. To prepare meatballs, combine first 9 ingredients
in a bowl; shape meat mixture into 30 meatballs.
Heat a large nonstick skillet over medium-high
heat. Coat pan with cooking spray. Add half of
meatballs to pan; cook 3 minutes or until browned,
stirring frequently. Place browned meatballs in an
electric slow cooker. Coat pan with cooking spray;
repeat procedure with remaining 15 meatballs_
2. To prepare sauce, combine tomato paste and next
7 ingredients. Add to slow cooker; stir gently to
coat. Cover and cook on LOW 6 hours. Serve over
couscous. Garnish with parsley, if desired. Yield:
6 servings (serving size: 5 meatballs, 1 cup sauce,
and 1/2 cup couscous).
Monday, February 8, 2010
Dip Master
At this year's super bowl party, I was told I have exceptional dip skills, but really I just followed a seasoning packet. Truth be told, dips and sauces are some of my favorite items to make. In college, we referred to this gem as "The Dairy Explosion."
HOT SPINACH AND ARTICHOKE DIP
(disregard the bread bowl in the image)

MAKES 4 cups dip
HOT SPINACH AND ARTICHOKE DIP
(disregard the bread bowl in the image)
MAKES 4 cups dip
PREP TIME: 10 Minute(s)
COOK TIME: 35 Minute(s)
INGREDIENTS
| 1 package (10 oz.) frozen chopped spinach, thawed and squeezed dry 1 package (8 oz.) cream cheese, softened 3/4 cup Hellmann's® or Best Foods® Real Mayonnaise 1-1/2 cups shredded cheddar or Monterey Jack cheese (about 6 oz.) 1 package Knorr® Vegetable recipe mix 1 can (14 oz.) artichoke hearts, drained and chopped 1 can (8 oz.) water chestnuts, drained and chopped 2 cloves garlic, finely chopped |
PREPARATION
I don't like mayo particularly so I only used 1/4 cup of mayo and 2/4 (aka 1/2) cup of sour cream. Also, I used fresh spinach cause that's how I roll. I believe this dish propelled the Saints to victory. I'm still full 24 hours later.Preheat oven to 350°.
Combine all ingredients except 1/2 cup of cheddar cheese. Spoon into a 2-quart casserole, then top with remaining 1/2 cup of cheese.
Bake for 35 minutes or until dip is hot. Dip, dip hooray!
Spanakopita Dip: Substitute feta cheese for the cheddar and omit artichoke hearts. Spoon into mini phyllo cups and bake 8 minutes or until filling puffs.
Sunday, January 31, 2010
Giving Mom a Break
I've been visiting Albany a bit since mom's surgery last weekend and thought I'd give her a break from cooking dinner tonight. I am no "whiz-bang" cook.... I'm more of a billowing smoke or "pfft" level cook so I rely on RealSimple.com to make me look good. I decided to try a puff pastry tart appetizer and a basic chicken entree. Ambitious!
Carmelized Onion Tarts with Apples

Con Poulos
Makes 2 tarts
Hands-on Time: 20m
Total Time: 55m
Ingredients
2 tablespoons olive oil
2 medium onions, sliced
2 red apples (such as Braeburn or Gala), cut into small pieces
kosher salt and black pepper
2 sheets frozen puff pastry (from a 17.3-ounce package), thawed
1/2 cup creme fraiche or sour cream
Directions
1. Heat oven to 400º F. Heat the oil in a large skillet over medium heat. Add the onions and cook, stirring occasionally, until soft and golden brown, 12 to 15 minutes. Stir in the apples, ½ teaspoon salt, and ¼ teaspoon pepper and cook until just tender, 2 minutes.
2. Place each sheet of pastry on a parchment-lined baking sheet and prick all over with a fork. Spread with the crème fraîche, leaving a 1/2-inch border. Top with the onion mixture and bake until the pastry is crisp and browned, 30 to 35 minutes. Cut into pieces before serving.
Besides having to go to 5 (yes, five) grocery stores to find the frozen puff pastry, this was actually a really easy recipe. Let's just ignore the fact that I left the rack in the oven on the lowest level and accidently burned the heck out of the bottom. Thank goodness puff pastry is flaky and the burned part was easily peeled off!

With a semi-successful appetizer completed, I started on the main course.
Pan-Roasted Chicken With Lemon-Garlic Green Beans

Serves 4
Hands-on Time: 15m
Total Time: 1hr 15m
Ingredients
- 6 tablespoons olive oil
- 2 lemons, 1 thinly sliced, 1 juiced
- 4 cloves garlic, minced
- 1 teaspoon kosher salt
- 1/2 teaspoon freshly ground black pepper
- 3/4 pound trimmed green beans
- 8 small red potatoes, quartered
- 4 chicken breasts (bones left in, with skin, about 3 1/4 pounds)
Directions
1. Preheat oven to 450°F. Coat a large baking dish or cast-iron skillet with 1 tablespoon of the olive oil. Arrange the lemon slices in a single layer in the bottom of the dish or skillet.
2. In a large bowl, combine the remaining oil, lemon juice, garlic, salt, and pepper; add the green beans and toss to coat. Using a slotted spoon or tongs, remove the green beans and arrange them on top of the lemon slices. Add the potatoes to the same olive-oil mixture and toss to coat. Using a slotted spoon or tongs, arrange the potatoes along the inside edge of the dish or skillet on top of the green beans. Place the chicken in the same bowl with the olive-oil mixture and coat thoroughly. Place the chicken, skin-side up, in the dish or skillet. Pour any of the remaining olive-oil mixture over the chicken.
Next time I think I'd cut down on the oil but otherwise it was great. Easy to prepare and tasty to eat. The chicken was moist and the green beans lemony. Mmmm mmmm. Dad did the dishes and mom got to relax... well as much as mom usually relaxes.
Sunday, January 24, 2010
Judy and Jason's Birthday Brunch
I woke up at the wee hour of 9 to dig through recipes looking for a good potluck brunch item. I didn't want to do eggs because of my nack for poor time management in cooking. So I picked this mushroom tart from Martha Stewart.com.
 This was my first experience with puff pastry. I remember mom used to put tuna in the puff pastry cups and as I've never been a fan of hot tuna, I avoided the puff as well. The recipe says to use a fork to prick the inside of the border. Does that mean within the one inch border or in the center of the tart? The pastry was hugely puffy in the oven before adding the goods. So, I guess I pricked it wrong.
Shiitakes have tough inedible stems that should be removed. For white mushrooms (called button when small), cremini, and portobellos, trim the spongy tip; the rest is edible.
Prep: 45 minutes
Total: 45 minutes
Ingredients
Serves 4
- Flour, for rolling out puff pastry
- 1 (from a 17.3-ounce package) sheet frozen puff pastry, thawed according to package instructions
- 1 medium onion, halved and thinly sliced
- 2 tablespoons olive oil
- Coarse salt and ground pepper
- 2 packages (10 ounces each) white mushrooms, trimmed and thinly sliced
- 1 packages (10 ounces) fresh baby spinach
- 2 ounces soft goat cheese, crumbled
Directions
- Preheat oven to 400 degrees. On a floured surface, roll the puff pastry out to a 16-by-10-inch rectangle. Trim uneven edges. Place the pastry on a baking sheet. With a sharp knife, lightly score dough to form a 1-inch border. Using a fork, prick dough inside the border every 1/2 inch. Bake until golden, rotating pan once, about 15 minutes or until tender.
- Meanwhile, in a small saucepan with a tight-fitting lid, toss onion with 1 tablespoon oil. Season with salt. Cover and cook over medium heat until onion begins to brown, about 5 minutes. Stir. Continue cooking with cover on for 15 minutes, stirring every 5 minutes. Set aside.
- In a large saucepan with a tight-fitting lid, heat remaining oil. Add mushrooms; cover and cook until tender and all liquid has evaporated, about 10 minutes. Fold in spinach; season with salt and pepper. Cover and cook until wilted, about 5 minutes more. Drain any liquid.
- Top dough with mushroom-spinach mixture. Scatter onion and goat cheese on top. Bake until cheese is lightly browned, about 15 minutes.
Tad looked in the oven and said "Oh, good we're taking pizza." It's a damn tart. $20 at the grocery for a fancy pizza. Arrived at the brunch, "Oh, that's a good looking pizza." It's a tart. "Do you want a pizza cutter. It might cut it better." No, cause it's a tart. Once the kids saw it, and picked off the goat cheese and the added sun-dried tomatoes from their pieces, it was clear to me. This is a $20 pizza. Gone in 10 minutes but definitely a pizza.
Subscribe to:
Posts (Atom)